

Do you find yourself hearing about Dropbox but just think it looks way too complicated? Maybe you haven't even looked and just presume it's too complicated?
If you have heard how invaluable Dropbox is and aren't using it, chances are you have answered 'yes' to one of the above questions :)
Dropbox couldn't be easier to use and you will find yourself wondering how you have survived without it once you start using it.
Dropbox is a cloud storage app/ website/ program that ranges from free to a various range of relatively cheap packages. Cloud storage means you can save your work anywhere and access it on any other device without having to remember your USB key, have room on your USB key or not have lost your USB key! Not only that, but you can share your files with other people easily - including large files that can't be emailed.
You can access it online at www.dropbox.com or you can download the app. Both look quite similar when open.

Much like traditional hard drive storage, you have folders in Dropbox which you can create and name appropriately. If you have Dropbox installed on your PC or Mac it will appear as an actual folder in the menu beside 'My Documents' and 'Computer' etc. It's business as usual (BAU) when saving to these folders. The advantage is that they will automatically begin to upload to your online account and become accessible anywhere in the world. You can also share these files with anyone in the world - including huge files like movies etc. How do you do it? Easily. Log on to the Dropbox website and follow the instruction in the image below:
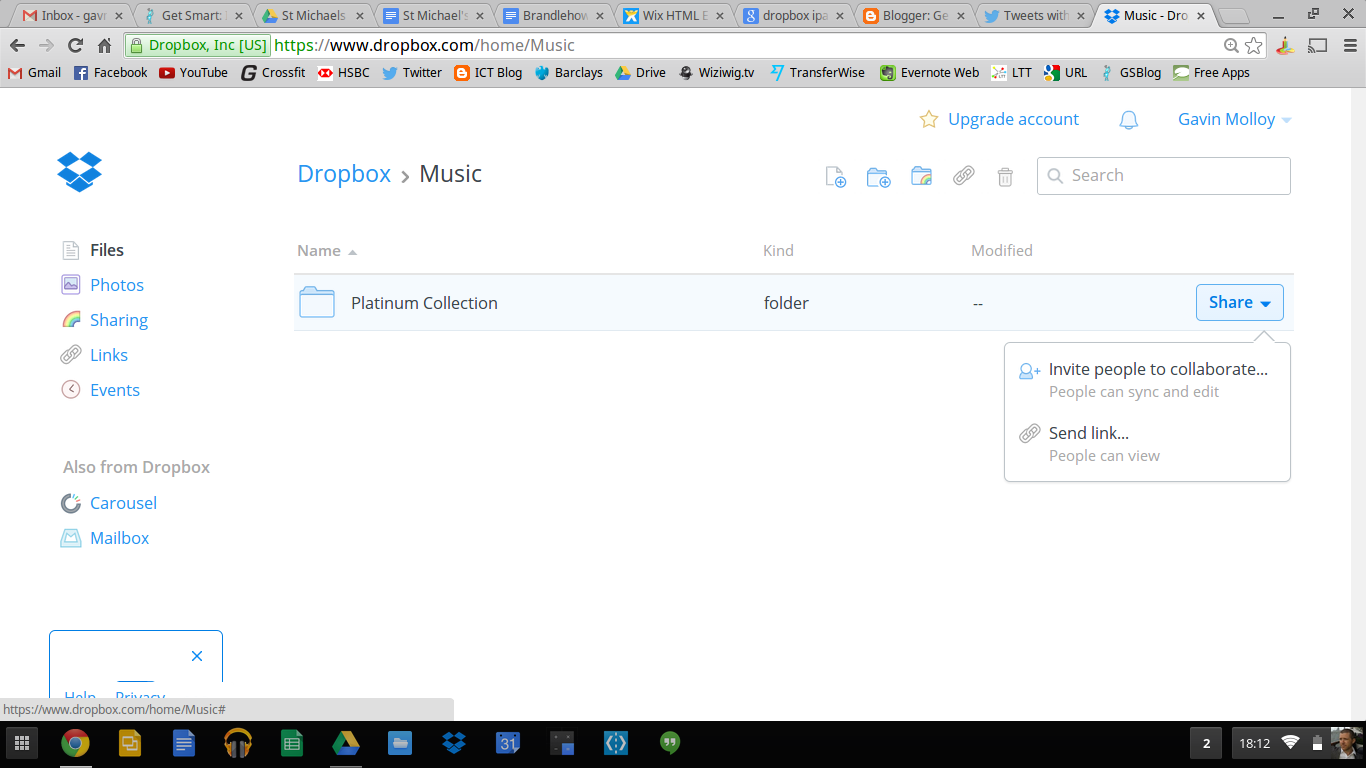
Here I am sharing the 'Platinum Collection' folder. I hovered the mouse to the right of the folder and the share button appears. Then I am offered two options 'Invite People to Collaborate' and 'Send Link'. See step 2 below for tips on sharing.
The app is invaluable for teaching and learning as students can save their work at the end of term and you will have it all in one folder on your computer - instead of having to plug each tablet into your computer and download them.You can use the app in 5 easy steps:
1. adding files/ creating a new folder:

Simply open the folder you wish to add files to > press the three circles (as in the image above) and select 'add files'. This will bring you to the camera roll and you can select images and videos. You can also use the three circles to create a new folder (see above). You can see in the image that I am currently in the 'Music' folder.
2. sharing files

If I press the box with the arrow beside the three circles I get the options to 'Send a Link' or 'Invite to Folder'. 'Send a Link' means the person you share the link with will be able to view and download the files - this is the safest option if you just want to share.'Invite to Folder' means that you are sharing the folder and that anything they add or delete will be added to or deleted from your original folder. This means you can lose work if it's not backed up and they can take up undesired space on your hard drive by adding large files to the folder. We really only use 'Send a Link' when we're sharing files.
3. More sharing methods

Sharing is caring after all; so Dropbox aims to give you as many options as possible. If you click the arrow in the box on the right of the screen you will get the options to share in all the methods available in the image above. The 'Open In' option allows you to open the work in an app and edit/ view it.
If you have any queries, feel free to pass them to info@edanu.ie .
Click here to subscribe to our monthly newsletters for more Edtech news and articles.
Thank you.
Recent News

